The Levitan Website
A personal website
Miscellaneous Crafts 3
- Snakes alive!
- Crawler
- Potato prints
- Drop the ball
- Puppet
- Hama Bead pictures
- Salt dough
- Crystallised flowers
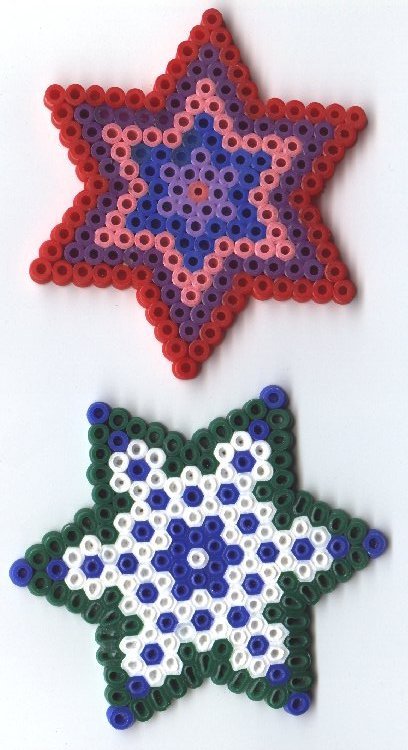
Hama Bead pictures
Use hama beads to make patterned coasters, etc. You can either create a picture/pattern within the whole figure (e.g. a cross within a circular shape), or create a shape (e.g. a cross, a Star of David, a fish).
You will need:
- Hama beads in different colours,
- Hama bead boards - several of different shapes & sizes,
- Greaseproof paper,
- Clothing iron,
- Ironing board,
- Paper,
- Crayons/pencils,
- Yoghurt pots (empty & washed!)
What you do:
- It's a good idea to sketch out your design to begin with, so give the kids some paper and pencils/crayons for this.
- Once they've created a design, they can collect beads in the relevant colours.
- Use empty yoghurt pots for them to put their beads into.
-
 Create the pattern/picture on a hama bead board.
- Use an adult for the next bit: place a piece of greaseproof paper over the design (enough to cover it all) and iron over the paper-covered beads with a cool iron (nylon setting) until the beads have melted together enough to stick to each other.
- Peel off the paper and allow to cool.
Top of page
Salt dough
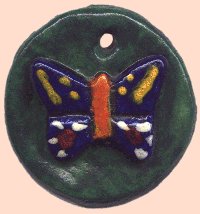 This is another craft activity that can be adapted for almost any theme. For example, make pairs of animals for a Noah's ark, a Nativity, or just simple things like a cross or fish symbol. Small designs can have holes pierced in them to make necklaces or hanging decorations. As this is a craft that needs several stages, it can be done over several sessions, e.g. make dough; make designs & bake; paint; varnish. You will need:
- 1 part Water,
- 2 parts plain Flour,
- 1 part Salt,
- Washable paint (that'll wash out of clothes!),
- Paint brushes,
- Cake/biscuit cut out figures, especially animals and people shapes,
- Palette knives (strong plastic art knives are best),
- Craft glue,
- Varnish
What you do:
- Make up the salt dough. You can either prepare this beforehand, or make it an activity in itself:
- Mix the salt and flour together
- Then stir in half the water in a mixing bowl.
- Gradually add the rest of the water, kneading the mixture until the dough has a smooth, firm consistency. Make sure you don't add too much water (the dough will become sticky).
- Knead for a further 5-10 minutes. Ideally, leave to rest for 30 minutes, but it can be used immediately
- Now make your shapes and designs. Here are a few ideas: Cross, Star of David, Fish Animals and people using cake/biscuit cutters for Nativity/Ark scene Tree plaques: stars, angels, bells Complex shapes (built up from several pieces), e.g. Tree of life (tree, birds, fruit, insects, flowers, leaves) Bead necklace or bracelet - can be decorated with letters to form messages, e.g. "Jesus loves me", WWJD
- Once the shapes/designs have been made, bake the dough to harden it. Complex models are best baked in sections that can later be glued together. Bake for 3 hours Or, if you are experienced, you can part bake (1 hour), moisten and join and then complete the baking (2-3 hours).
- Allow to cool thoroughly
- Paint and decorate to complete.
- Allow to dry very thoroughly before applying further coats of paint and especially before varnishing.
- Varnish - use at least 3 coats, allowing time to dry between coats. Try to get a quick drying, clear varnish for this.
Top of page
Crystallised flowers (for Mothering Sunday)
Instead of giving your mother a posy of real flowers, try this idea for a change. (Or give her a posy as well)
What You Need:
- Egg white,
- Caster sugar,
- Sieve or sugar dredger,
- Grease-proof paper,
- Paint brushes,
- Small flowers or petals*
What you do:
- Beat the egg white until it forms soft peaks.
- Paint each flower until it is covered in the egg white - don't dip them! Use the sieve or dredger to sprinkle suagr over the flowers (scoop up and reuse the residue sugar).
- Put a piece of greaseproof paper on a tray and lay out each flower to dry.
- Leave for 2-3 days in a warm place like an airing cupboard.
* Try these flowers: rose petals, primroses, violets, nasturtiums, lily of the valley, miniature daffodils.