The Levitan Website
A personal website
Christian Crafts 2
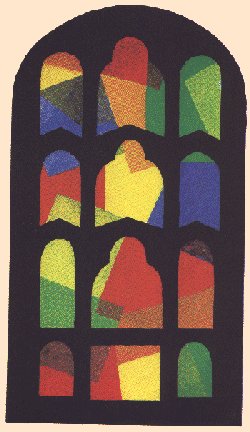
Stained glass designs
 Create your own "stained glass windows" using black card cut-outs with coloured cellophane or tissue paper.
What You Need:
- Black or dark card,
- Several different coloured papers, either cellophane or tissue (don't mix them as the results look strange),
- PVA glue,
- Paint brushes,
- Sellotape
What you do:
- Cut the black card into a window shape, e.g. with an arched top.
- Cut out segments in the window to leave lots of shaped holes: these can either be in a geometric/symmetrical pattern, or random.
- Cut a second piece of card into as nearly exactly the same shape and patterns as possible.
- Carefully cut pieces of tissue or cellophane to the required sizes.
- Carefully paint one side of the window with glue.
- Lay the coloured paper on the glue, taking care not to allow it to crease or slide. Try overlapping the paper to give different colour combinations.
- Use Sellotape to carefully fasten the pieces on the overlaps, but so the tape isn't visible through the window.
- Carefully glue the second piece of card to the "back" of the window, thus covering all the Sellotape and overlap ends.
Hang the finished window in a real window.
Top of page
Story Wheel
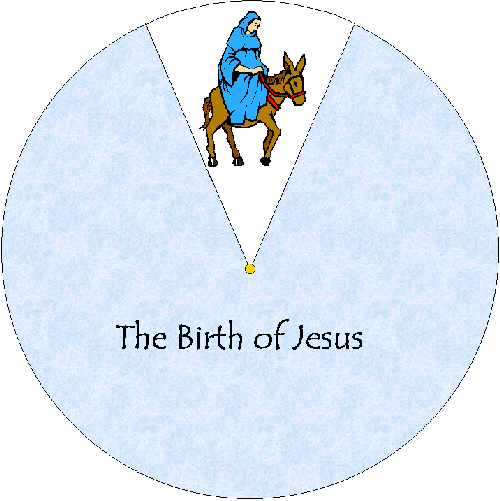
 This is a classic craft where you make a circle with a segment cut out to reveal a scene on another circle underneath. As you turn the upper circle, further scenes are revealed. You can use this to tell stories, e.g. The Lost Sheep, The Good Samaritan; as a prayer wheel (e.g. morning, noon, night); etc.
You will need:
- Scissors,
- Ruler,
- Thick white cardboard,
- Lightweight coloured cardboard*,
- Markers or felt pens,
- PVA glue*,
- Paper fastener
What to do:
- Cut a 12-inch circle from the thick cardboard.
- Cut an identical circle from the lightweight cardboard.
- Use the ruler to divide the thick cardboard circle into four, six or eight equal wedge-shaped segments (depending on the number of "scenes" you want to create).
- Cut a segment from the lightweight cardboard that is slightly smaller than one segment of the thick cardboard circle. Make sure it does not go all the way to the centre of the lightweight cardboard circle.
- Use the markers or felt pens to decorate each segment on the thick cardboard to tell your story (or whatever). If it's a story, you could reserve one segment for a title, or put it on the cover piece.
- Attach the lightweight cardboard circle to the top of the thick cardboard circle by putting the paper fastener through the centre of both circles.
Use the wheel to tell the story, turning the top wheel to expose the picture for each of the scenes. The example here shows scene 1 from the birth of Jesus, with Mary riding on the donkey. Note, I've put the name of the story on the coloured cover sheet
*Note: instead of coloured cardboard, you could glue some bright wrapping paper on top.
Top of page
Advent candle
 A simple craft for Christmas.
What You Need:
- Candles - at least 15cm long,
- Indelible markers,
- CDs (any "junk" CDs that aren't wanted!),
- Plasticene,
- Strips of card the same length as the candles,
- Ruler
What you do:
- Carefully mark 24 equal divisions on the card, leaving about 2cm at one end.
- Use the card as a template for marking the candles.
- Once the candle has been marked with 25 divisions - taking care to leave the 2cm gap at the bottom - write numbers from 1 to 24, running from the top to the bottom of the candle.
- If you like, draw a scene or pattern on the other side of the candle (e.g. a holly string)
- Put a "dollop" of Plasticene on the CD with the shiny side up.
- Carefully anchor the candle in the Plasticene.